Detail Revit Drawings: How to Achieve Quality and Beauty
In architecture, detail drawings are where precision meets design intent. They’re more than technical documentation — they’re essential for communicating how buildings come together. When working in Revit, these details can be crafted with clarity and control, blending the power of BIM with the artistry of architectural drawing.
This guide explores how to produce high-quality, beautifully presented detail drawings in Revit that are not only accurate but also enhance the visual quality of your drawing set. Revit’s combination of 3D modelling and intelligent 2D drafting tools allows you to strike a balance between automation and bespoke graphic presentation. With best practices, strategic use of 2D drafting tools, and a smart approach to grouping and annotation, your Revit drawings can meet the highest standards of design documentation.
The best Revit drawings balance information from the 3D model with customised 2D detail overlays. Here’s how to build detailed views that are clear, efficient, and adaptable across your Revit project.
What to Model vs. What to Draft
Use the 3D model to show:
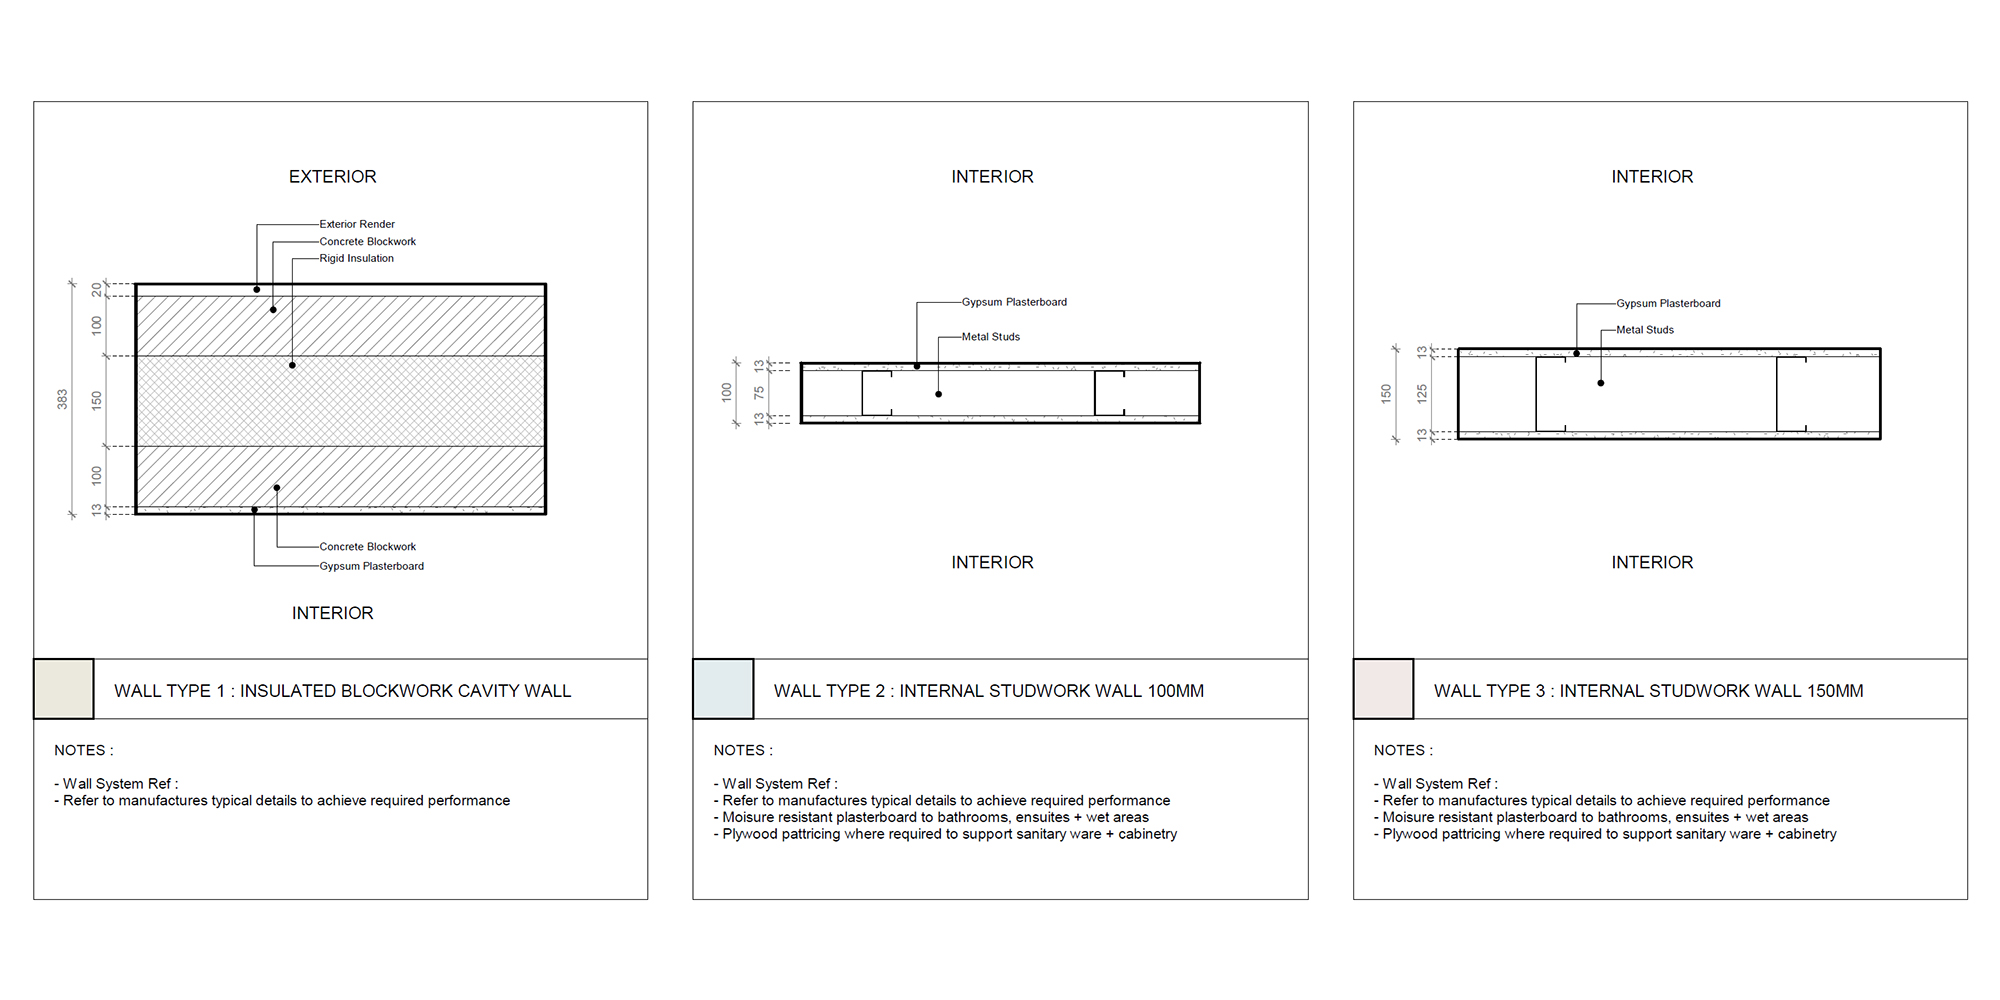
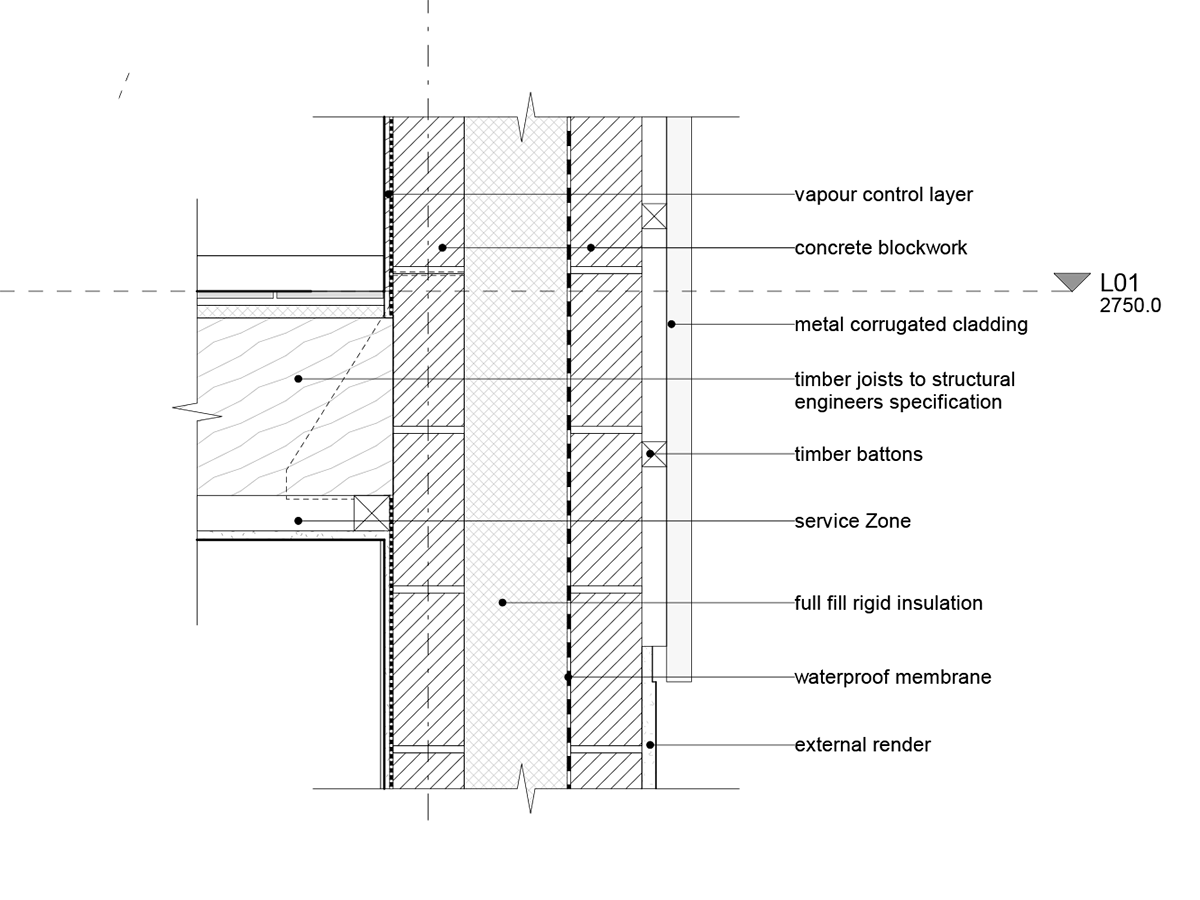
Wall, floor, and roof build-ups
Structural and construction connections
Cut hatches for materials
Use 2D detailing tools for:
Fine-scale elements (1:20, 1:10, 1:5)
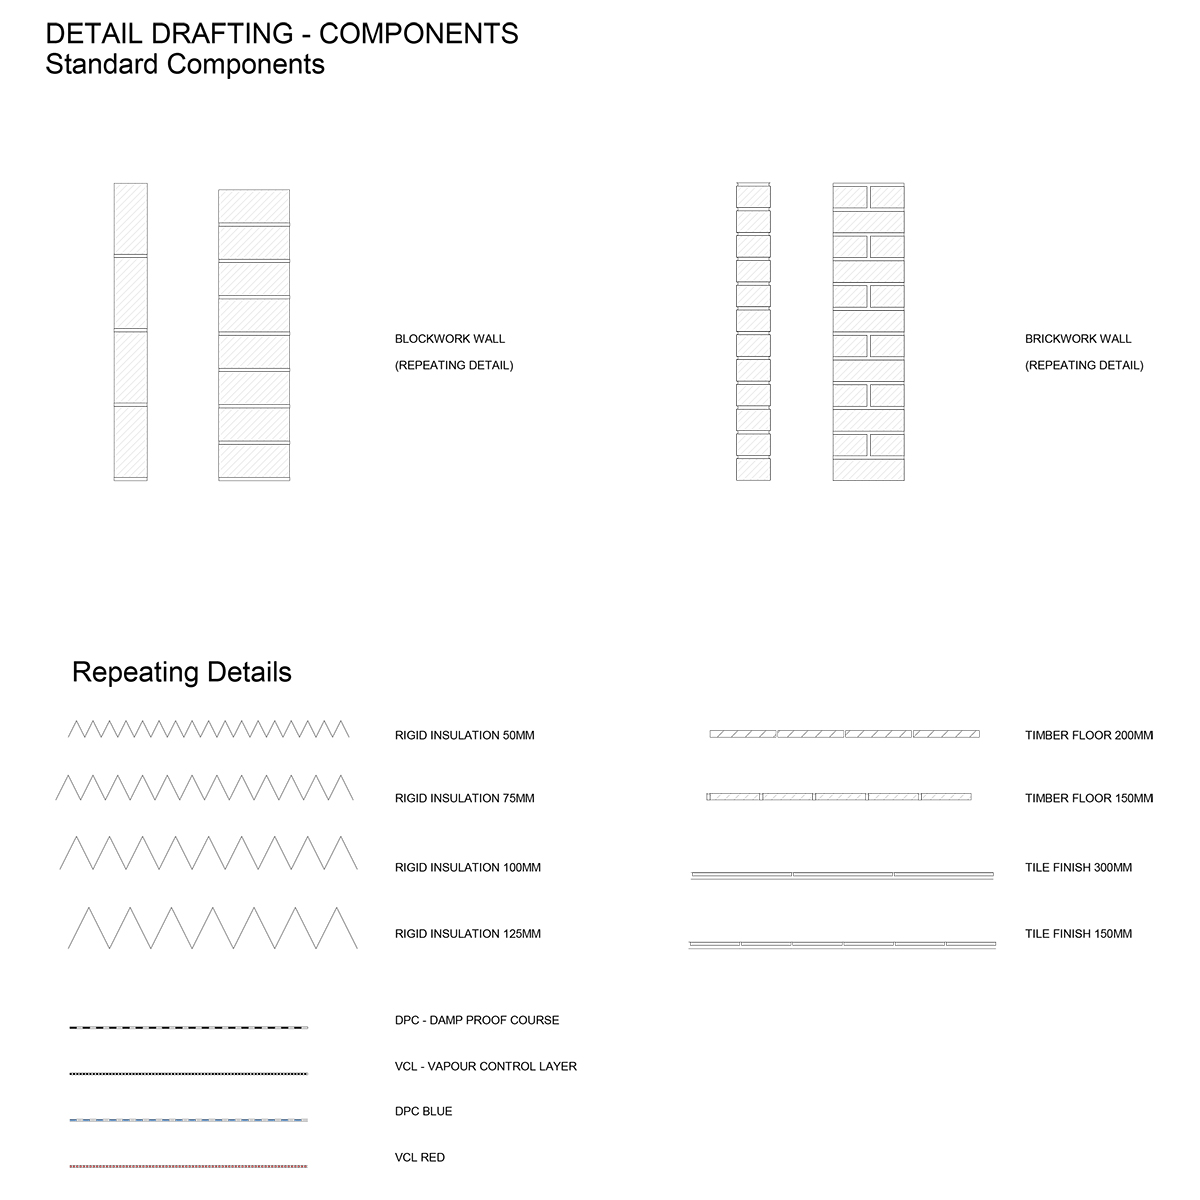
Repeating details, fixings, flashing, and joinery
Enhanced graphic output beyond the capability of 3D alone
Group 2D detail components together to reuse them across multiple views and scales.
10 Best Practices for Creating Revit Detail Drawings
Always show the 3D model in your detail views. Don’t mask or hide key components like walls, floors, or roofs.
Minimise masking—use filled regions only when absolutely necessary to clean up complex model elements.
Use detail items and repeating details, not loose lines, for precision and consistency.
Replace text with tags (e.g., material or detail item tags) to enable automatic updates and avoid redundancy.
Group all 2D detail elements in your view for easier editing and consistent reuse.
Name your detail groups with a consistent convention for clarity and management.
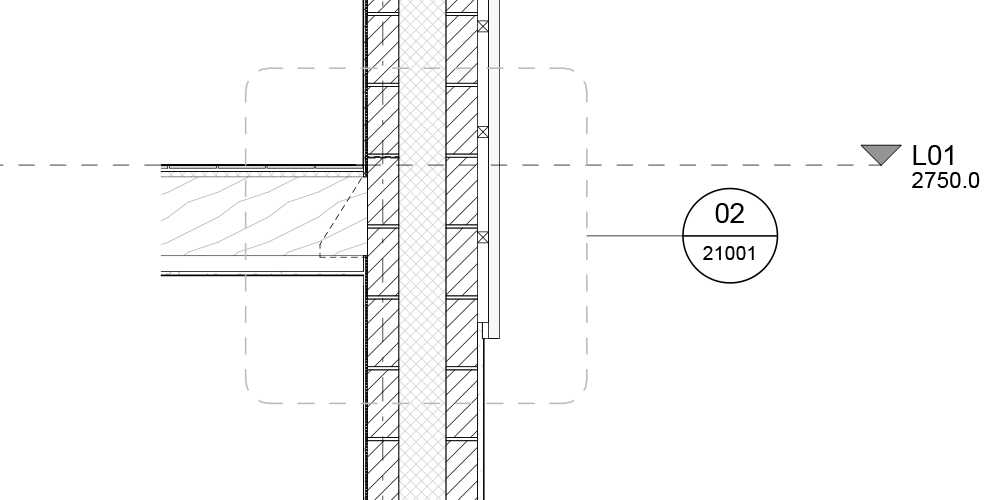
Create callout views at different scales (e.g., 1:5 or 1:10) for high-resolution details of specific areas.
Copy and paste groups between views using “Paste in Place” to maintain alignment with the model.
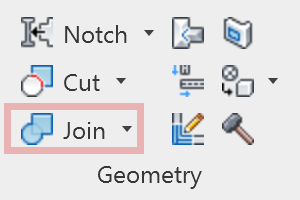
Adjust model join conditions using the Join tool and element properties (walls to floors, roofs, etc.).
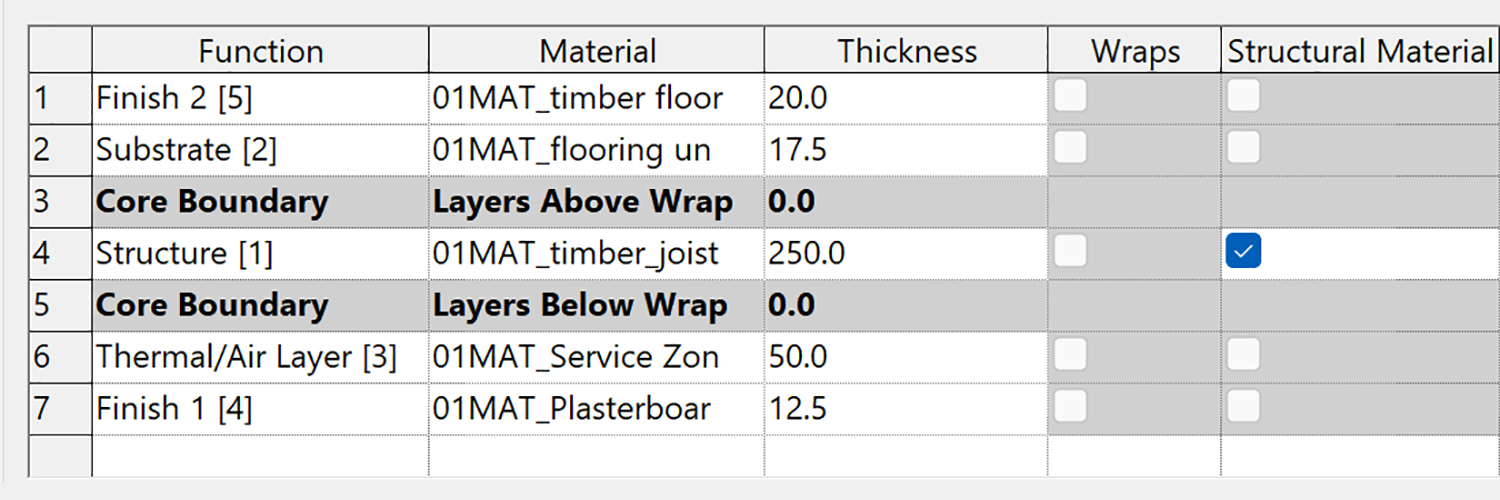
Edit type properties and core boundaries to control how material layers interface and wrap.
Step-by-Step: Drafting a Revit Detail Drawing:
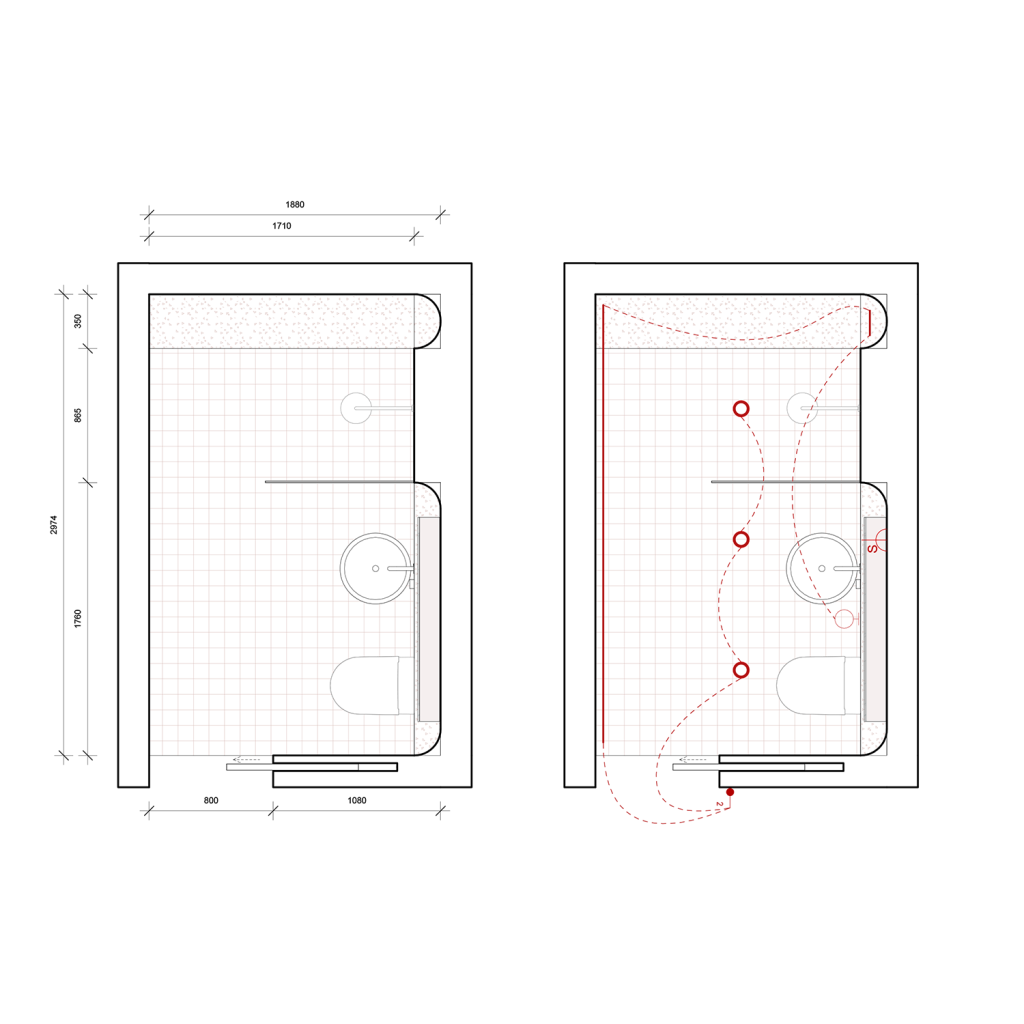
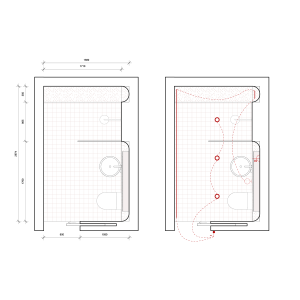
1. Draw a Section
Cut a section through the area needing detail.
Set the view scale (e.g., 1:10 or 1:5) for detail accuracy.
2. Adjust Floor + Wall Positions
Use the Edit Profile command to align structural edges accurately.
3. Join Model Elements
Use the Join and Attach to Element tools to connect floors, walls, and roofs properly.
4. Edit Construction Layers
Use Type Properties to adjust material layers, core boundaries, and wrapping behavior to reflect actual build-ups. Change the core boundary in the wall / floor / roof build-up:
5. Add 2D Detail Overlays
Overlay detail items, filled regions, and lines as needed.
Use loose lines minimally—prefer smart components like detail families.
Creating effective detail drawings in Revit is about more than just drafting – it’s about control, clarity, and consistency. When done right, your Revit drawings become a reflection of both design quality and technical precision.
By using Revit’s full toolset – modeling, annotation, and intelligent 2D detailing – you can produce architectural details that are both beautiful and buildable.
To save yourself the time and effort of creating a Revit template from scratch, we have done all the work for you! Through rigorous testing and development we have built a full Revit Graphic Template for purchase. To learn more about our custom made templates, download our Free Template Guide from our home page. Visit our home page or our LinkedIn page for further information.